If you’ve landed here, chances are you’re curious about how to make weed brownies. It’s no secret that they’ve taken the crown as one of the most iconic, not to mention delicious, ways to enjoy cannabis. So, whether you’re a baking beginner or a seasoned pro in the kitchen, this guide is going to walk you through everything you need to know to make some seriously stellar brownies.
Before we get into the nitty-gritty, it’s important to talk about the legal side of things and safety tips. Make sure you’re aware of your local laws regarding cannabis use and possession, because hey, staying on the right side of the law is part of the recipe for a good time.
Also, when it comes to consumption, remember the golden rule: start low and go slow. It’s all fun and games until someone eats too much.
Now, back to the fun stuff… in this guide, we’ll cover choosing the right strain, making your own cannabutter (because that’s the secret sauce), and finally, how to bake brownies that will have your friends coming back for more (but not too soon, right?). Grab your apron, and let’s get baking!
Understanding Cannabis
Before you start grinding up your greens, it’s key to understand exactly what you’re cooking with. Not all buds are created equal, and picking the right type can make or break your brownie experience.
Types of Cannabis Suitable for Edibles
When it comes to edibles, both THC and CBD play a big role, but they bring different effects to the party.
THC is like the life of the party, giving you that euphoric, high feeling. CBD, on the other hand, is the chill friend who doesn’t cause a scene, offering more of a relaxing, calm experience without the psychoactive effects.
THC vs. CBD: Effects and Preferences
Depending on what kind of rollercoaster ride you’re looking for, you might opt for a strain higher in THC or one with more CBD. If you’re all about catching those feel-good vibes and giggles, THC is your go-to. But if you’re looking to mellow out without the mental fireworks, CBD-heavy strains are your best bet.
Choosing the Right Strain
When you’re scrolling through our menu, staring down rows of jars filled with green goodness, keep in mind there are mainly three types of cannabis strains to choose from: Indica, Sativa, and Hybrid.
- Indica strains are like a cozy blanket on a cold evening, perfect for chilling out, unwinding, and catching some z’s after you partake in your brownie tasting.
- Sativa strains are more of a daylight delight, known for their energizing effects that can spark creativity and keep you moving.
- Hybrid strains are best of both worlds, mixing it up to create a balance between the relaxation of Indica and the uplift of Sativa.
When it comes to recommendations for baking, consider what kind of experience you want your guests (or just you, no judgment here) to have. For a more laid-back movie night, maybe go indica. For a creative art session or some upbeat socializing, sativa could be the way. And if you just can’t decide, a hybrid might bring you that sweet spot you’re looking for.
Just remember, the strain you choose will set the tone for the experience, so choose wisely!
Decarboxylation: The Crucial Step
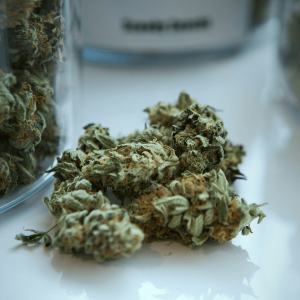
Before you toss some herb into your brownie mix, there’s a crucial step you can’t skip—decarboxylation. Sounds fancy, but it’s just science speak for “activating your weed.”
By heating your cannabis, you’re turning THCA and CBDA into the THC and CBD that actually get you those effects you’re looking for. Without this step, your brownies might taste like a plant, but they won’t pack the punch you’re aiming for.
Here’s a step-by-step to get you there:
- Preheat your oven to 245°F (118°C). Low and slow does the trick.
- Break up your buds into small pieces by hand or with a grinder. No need to turn them into dust, just a nice, even crumble.
- Spread the pieces out on a baking sheet. A piece of parchment paper helps with cleanup.
- Bake for 30-40 minutes for a perfectly decarbed batch. Give the tray a little shake halfway through to ensure even exposure.
- Once it’s cooled down, your cannabis is ready to be turned into the best cannabutter or oil for your brownie mix.
Remember, patience is key with decarboxylation. Rushing it could mean waving goodbye to the good stuff that puts the “special” in your brownies.
Cannabutter or Cannabis Oil?
When you’re at the crossroads of deciding whether to use cannabutter or cannabis oil in your brownies, think about the endgame of your baked goods.
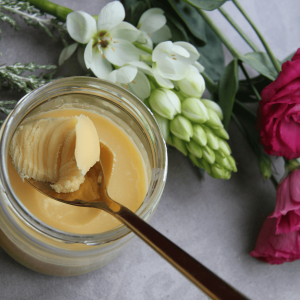
Cannabutter, which is just cannabis-infused butter, has that rich, creamy texture and adds a depth of flavor that’s hard to beat. It’s the go-to for those melt-in-your-mouth, classic brownies that feel like a hug from the inside. Plus, it’s a staple for a reason – it mixes perfectly with the rest of your ingredients, ensuring every bite has that smooth, velvety feel.
Cannabis oil, on the other hand, is a bit more versatile and a tad easier to dose accurately. It’s the easiest choice for a lighter, perhaps slightly healthier brownie recipe, and it’s great if you want to keep the weed taste on the down-low. Cannabis-infused oil can be especially good if you’re aiming for a cannabis brownie recipe with a more refined texture, or if you’re trying to cater to dietary restrictions.
How To Make Cannabutter
Ingredients needed
- 1 cup of butter
- 1 cup (7-10 grams) of ground, decarboxylated cannabis
Cooking instructions
- Melt the butter in a saucepan over low heat and add your decarboxylated cannabis.
- Simmer on low, stirring frequently to avoid burning, for about 2-3 hours. Yes, it’s a slow dance – keeping it low and slow ensures maximum infusion.
- Once done, strain the butter into a container using a cheesecloth or fine mesh strainer to remove all the plant material. Make sure you squeeze out every last drop of that green gold.
- Cool it down, and voilà, cannabutter is at your service!
How To Make Cannabis Oil
Ingredients needed
- 1 cup of coconut oil or any oil of your choice
- 1 cup (7-10 grams) of ground, decarboxylated cannabis
Cooking instructions
- Heat the oil in a saucepan on a low heat and mix in your decarboxylated cannabis.
- Keep the heat low and steady, stirring occasionally for about 2-3 hours to avoid any cannabinoids evaporating.
- Like with the cannabutter, strain the oil through a cheesecloth or mesh strainer to get rid of all the plant bits, squeezing out as much oil as you can.
- Cool it down and store it; your cannabis oil is ready to elevate your brownie game!
Whether you decide to go the cannabutter or cannabis oil route, both will ensure your brownies come out to be the talk of the town (or at least your living room).
Calculating Dosage: How to Determine the Strength of Your Edibles & Tips for Safe Consumption
Figuring out just how strong your edibles are can feel like you’re back in math class, but it’s crucial unless you want to end up way more baked than your brownies.
Start by knowing the percentage of THC in your cannabis. Say you have one cup of cannabutter or oil, infused with a strain that’s 15% THC. Doing a little bit of arithmetic will give you a rough estimate of how many milligrams of THC are in that cup.
Remember, edibles hit differently than smoking, so go easy. A good rule of thumb for beginners is to start with 5-10 mg of THC per serving and see how that treats you. And as always, give it time. Marijuana brownies can take up to two hours to take full effect, so patience is key!
Classic Weed Brownies Recipe
Who doesn’t love a good old classic weed brownie? Easy to make, impossible to mess up, and they always hit just right. Here’s how you whip up a batch of cannabis brownies:
Ingredients list
- 3/4 cup of cannabutter (our star player)
- 2 cups of sugar (because sweet is neat)
- 1 cup of all-purpose flour
- 1/2 cup of cocoa powder (the good stuff)
- 1/2 teaspoon of baking powder
- Pinch of salt (to balance the sweet)
- 4 eggs (the binder)
- 2 teaspoons of vanilla extract (for that “mmm” factor)
- Optional: nuts, chocolate chips, or whatever floats your brownie boat
Step-by-step baking instructions
- Preheat your oven to 350°F (175°C). Grease up a 9×13 inch baking pan or line it with parchment paper.
- In a bowl, mix the flour, cocoa powder, baking powder, and salt. Keep it aside.
- Melt that cannabis butter gently, mix it with sugar, and then beat in the eggs one by one until it’s looking smooth.
- Stir in the vanilla extract, then fold in the dry ingredients until just combined. If you’re adding any optional goodies, now’s the time.
- Pour the brownie mixture into the prepared baking pan, smooth the top, and bake for about 20-25 minutes. You want them moist but not undercooked, so a toothpick should come out with a few crumbs.
- Cool, cut, and serve. Patience is a virtue; they taste even better when cool!
Vegan Weed Brownies
For our plant-based pals, you don’t have to miss out on the fun. Making vegan cannabis-infused brownie edibles is as easy as swapping a few ingredients.
Adjustments for a Vegan Recipe
- Replace regular butter with coconut oil or vegan butter for your canna infusion.
- Use flax eggs (1 tablespoon of ground flaxseed with 3 tablespoons of water equals one egg).
Ingredients and instructions
Follow the classic recipe but swap in your vegan alternatives. Additionally, some cocoa powders and sugars are more vegan-friendly than others, so double-check your brands.
From there, you’ll have a batch of brownies that everyone can enjoy, no dairy or eggs required!
Gluten-Free Weed Brownies
Got a gluten sensitivity or just cutting down? No worries, we’ve got your back with a gluten-free adaptation that’s just as delicious.
How to adapt the recipe for gluten sensitivities
- Swap out the all-purpose flour for your preferred gluten-free flour blend. Just make sure it’s a 1-to-1 type that’s meant for baking.
Ingredients and instructions
Everything stays the same as the classic recipe but with your gluten-free flour. It’s that simple. You might want to adjust the baking time slightly, as gluten-free flour can behave a bit differently, but just keep an eye on it. And remember, gluten-free doesn’t mean taste-free; these brownies pack the same delicious punch, no gluten needed!
Whether you’re a classic, vegan, or gluten-free brownie fan, there’s a recipe here that can make your day a little higher and a lot tastier. Remember, it’s all about having fun and enjoying the ride – or, in this case, the high.
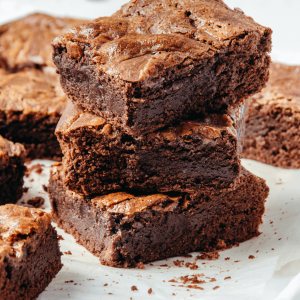
Enhancing Your Brownies: Mix-ins and Flavor Ideas + Decorative Tips
Taking your brownies to the next level is all about creativity and playing around with what you have in the kitchen.
Mix-ins can transform your basic batch into a gourmet treat that’s uniquely yours. How about swirling in some caramel or dolloping peanut butter on top before baking? Nuts bring a satisfying crunch, while white, milk, or dark chocolate chips can double down on the chocolatey goodness.
For adventurous souls, a sprinkle of sea salt on top can elevate the sweetness and add that chef’s kiss of sophistication.
And hey, don’t stop at what’s inside—let’s talk about making those brownies pretty enough to Instagram (before they get devoured, of course). A simple dusting of powdered sugar can give them a snow-capped mountain look, or get artsy with some stencil designs. If you’re feeling fancy, drizzle them with melted chocolate or a glaze for that glossy, patisserie finish.
Storing Your Brownies: Best Practices for Freshness & How to Prolong Shelf Life
After you’ve gone through all the fun of baking those killer weed brownies, you’ll want to keep them tasting amazing for as long as possible, right? Here’s the lowdown on keeping them fresh.
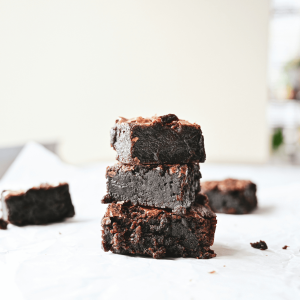
First off, make sure your brownies have cooled down completely before you even think about storing them. If they’re still warm, condensation can make them soggy, and nobody wants that. Once they’re cool, pop them into an airtight container. If you have layers of brownies, separate them with parchment paper to keep them from sticking together.
Now, you can leave them at room temperature if they’re going to be gobbled up in a couple of days. For a longer shelf life, stick them in the fridge; they’ll be good for about a week. And for the real long haul? Freeze them! Wrapped well, they can last for a couple of months. Just thaw them at room temperature when you’re ready for a treat.
Remember, edible potency can diminish over time, so if you’ve stored them for a while, you might need to adjust your expectations (and consumption) accordingly.
Conclusion
Alright, here’s the quick wrap-up on our weed brownie masterclass. Whether you’re all about that classic brownie, living the vegan dream, or keeping it gluten-free, we’ve got you covered with easy tweaks to bake the perfect batch. Remember to swap in those cannabutter or oil alternatives, switch up eggs for flax if you’re plant-based, or go for a gluten-free flour mix to keep things smooth.
Now, boosting your brownies is a game of mix-ins and creativity. Go nuts with, well, nuts, or get fancy with chocolate chips and a swirl of caramel. The sky’s the limit, so get funky with it. And don’t forget to make those bad boys look as good as they taste with some killer decorative tricks.
Storing them right means you can enjoy your hard work for days (or months in the freezer). Just keep them cool, separated, and in airtight containers to maintain freshness.
And the most important part? Savor responsibly and share the love. Weed edibles are all about a good time, but keep careful watch over the dosing. Start small and go slow, especially if you’re sharing with friends. It’s all about enjoying the ride – and the tasty treats.
Happy baking!
Frequently Asked Questions (FAQs)
1. How much of a weed brownie do you need?
Start with the idea that “less is more.” If it’s your first ride with edibles, try a small piece, like a quarter or half of a brownie, and wait a full two hours to see how you feel before considering more. Everyone’s body reacts differently, so it’s important to take it slow, especially with potent brownies.
2. What is weed in brownies called?
The magic ingredient making your brownies not just tasty but also a bit trippy is usually referred to as “cannabutter” or “cannaoil.” These are just your regular butter or oil infused with cannabis. When it’s baked into brownies, some stoners just call the treat “weed brownies” or “pot brownies.”
3. How much distillate should I put in brownies?
If you’re using distillate, which comes already decarboxylated (meaning it’s ready to go, no extra prep needed), think about the total THC content you’re aiming for. A common guideline is about 5-10mg of THC per serving. But remember, distillate is potent, so start with less; you can always add, but you can’t take away.
4. How long do edibles last after being opened?
Once you’ve opened your batch of brownies, if you’ve stored them right, they’ll be kickin’ around for a good time, not a long time. At room temperature, they’ll last a couple of days. In the fridge, you’re looking at about a week of peak freshness. Frozen? They’re okay to eat for a couple of months. Just remember, potency of homemade edibles might dip over time, so what was once a nice high might become a bit more mellow.

 Rewards


