Looking to learn how to make cannabutter fast? If so, you’ve come to the right place!
Better than olive or coconut oil, in our humble opinion, cannabutter is a versatile champion of cannabis-infused recipes that can add a little ‘extra’ to your brownies, soup, and even your morning coffee. But the key to unlocking this world of canna-infused flavors (without spending a lifetime in the kitchen) is in the preparation.
Being prepared with a quick cannabutter-making process means success is just around the corner.
So sit back, grab your favorite snacks (you’re going to need them later), and let’s take a deep dive into the world of making weed butter, covering everything from its culinary versatility to the most efficient preparation for quick results.
Selecting the Right Cannabis Strain for Cannabis Butter
Choosing the right strain of cannabis for your butter is like selecting the perfect wine for your meal. The dish is adequate, sure, but the right pairing takes it from “meh” to magnificent!
Understanding THC and CBD Content for Desired Effects
Compared to other cannabinoids, THC and CBD are the acclaimed superstars of cannabis, making a perfect duo for cannabutter. THC is the main psychoactive cannabinoid, the one responsible for that euphoric high, while CBD is non-psychoactive and lauded for its potential therapeutic benefits.
The CBD:THC ratio in your strain determines the balance between feeling high (THC) and potential wellness benefits (CBD). So peruse the menu and pick the effects that best suit your desires.
Understanding the Difference Between Indica, Sativa, and Hybrid
Now, let’s talk types: Indica, Sativa, and Hybrid.
Indica is like your ‘nightcap’, as it’s known for its relaxing and calming effects, perfect for a late-night movie marathon. Sativa, on the other hand, is the ‘morning coffee’ of strains, providing uplifting and energetic effects.
Hybrids blend the best of both worlds, offering a balance between indica’s relaxation and sativa’s invigoration.
Decarboxylation: Activating Cannabinoids for Potency
Decarboxylation is a fancy term for a simple concept: heating your cannabis to activate its psychoactive potential.
Think of it as the autocorrect of the cannabis world – it corrects the ‘raw’ state of cannabis into a potent, more ‘readable’ form. Without decarboxylation, your cannabutter might end up more butter than ‘canna’, and that’s a party no one wants to attend. Decarboxylation is the key to perfect homemade edibles.
Grinding Techniques for Optimal Cannabis Infusion
While it might seem like a minor step, grinding your cannabis buds properly can make a world of difference. A consistent, coarse grind allows for optimal infusion into your butter. Think of your grinder as your sous chef – it doesn’t get the limelight, but without it, your kitchen (and your recipe) could fall apart.
Step-By-Step Guide to Making Cannabutter Fast
Below you’ll find a quick and easy guide on how to make cannabutter. This tutorial will guide you through every step of the process. From picking the perfect cannabis strain and grasping the vital role of THC and CBD, to mastering the art of decarboxylation and grinding.
Keep reading and soon you’ll be able to make cannabutter like a pro.
Step 1: Gather Your Ingredients
The first step in making your cannabutter is to gather all of your necessary ingredients. This will include your choice of cannabis strain, butter, water, and the necessary kitchen equipment such as a grinder, saucepan, cheesecloth, and a storage container.
Step 2: Decarboxylate Your Cannabis
Remember that all-important decarboxylation process we talked about? Now is the time to put it into action. Spread your cannabis out on a baking sheet and bake at 245°F (118°C) for about 30-40 minutes. This will activate the cannabinoids, making them more potent.
Step 3: Grind Your Cannabis
Once your cannabis buds are decarboxylated, it’s time to grind it up. Remember, a coarse grind is ideal for optimal infusion.
Step 4: Melt Your Butter
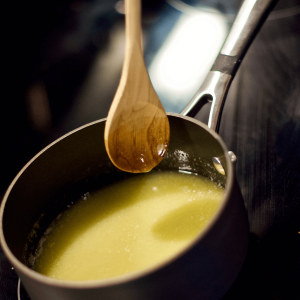
Now, it’s time to melt your butter in a medium saucepan over low heat. Easy enough, right?
Step 5: Add Water and Cannabis to the Melted Butter
Once your butter is melted, add some water and your ground cannabis. The water helps prevent the butter from burning, and the cannabis will start to infuse with the butter.
Step 6: Simmer
Let your butter, water, and cannabis mixture simmer on low heat for about 2-3 hours. Stir occasionally to prevent any sticking or burning.
Step 7: Strain Your Cannabutter
Once your mixture has simmered for a few hours, it’s time to strain out the plant material using a cheesecloth. Squeeze out as much liquid as possible.
Step 8: Cool and Store
Let your weed butter cool, then store it in a sealed container in the refrigerator. Now you have a batch of cannabutter ready to make your favorite recipes even better!
Remember, the potency will depend on the strain you used, so take it slow when you first start using your cannabutter.
Quick Cannabutter Extraction
So you’ve got your strain, you’ve got your kitchen arsenal, and you’re ready to dive in. But wait! How exactly are you going to extract that oh-so-precious cannabis-infused butter?
We’re glad you asked! Let’s dive into the three most popular methods: the slow cooker, microwave, and stovetop.
Choosing an Extraction Method: Slow Cooker, Microwave, or Stovetop
Choosing an extraction method is like choosing a Netflix show to binge-watch on a lazy Sunday afternoon. It all depends on how much time you have and how involved you want to be.
The stovetop method is fast and furious, with the whole process done in about 2-3 hours.
The microwave method is the speediest option, ready to serve in just a few minutes. It’s perfect for when you’re in a rush.
The slow cooker method is the turtle of the race, slow and steady, taking anywhere from 4 to 8 hours. The benefit? It’s practically hands-off, allowing you to chill while your butter infuses.
Importance of Proper Temperature Control
Temperature control isn’t just important; it’s the do-or-die aspect of making cannabutter. Too low, and you won’t get all the goodness out of your cannabis. Too much heat, and you risk burning off all those precious cannabinoids.
The ideal temperature for making cannabutter is around 160 to 200 degrees Fahrenheit (71-93 degrees Celsius). This low-and-slow approach ensures you don’t burn off the beneficial cannabinoids while allowing adequate time for the THC and CBD to infuse into the butter.
Remember to stir occasionally as overheating can lead to the loss of potency.
Time-saving Tips for Efficient Extraction
Getting a bit antsy? We get it. So, here are a few tips to speed up the process.
- Make sure you grind your cannabis evenly for maximum extraction.
- Watch your temperatures like a hawk; remember, it’s all about that ‘just right’ sweet spot!
- Multi-task! While your butter is infusing, why not prep the rest of your recipe? Before you know it, you’ll have your cannabutter ready and your dish prepped.
Ingredients and Ratios: The Spice of Cannabutter Life
When it comes to getting the right cannabis-to-butter ratio balance is key, and it’s a delicate dance.
Too much cannabis and you risk a strong, overpowering taste and a potentially too-intense effect. Too little, and well, you’re just eating flavored butter, aren’t you?
Needless to say. deciding on the perfect ratio of cannabis to butter can truly make or break the end result. A generally recommended starting point is 1 cup of butter to 7-10 grams of cannabis. But remember, your preference may vary depending on the potency of your strain and your desired strength. It’s your cannabutter recipe, after all!
Selecting the Right Type of Butter for Infusion
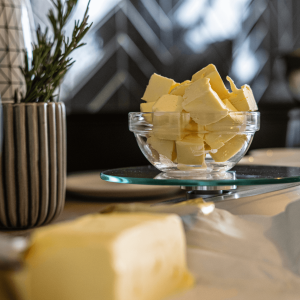
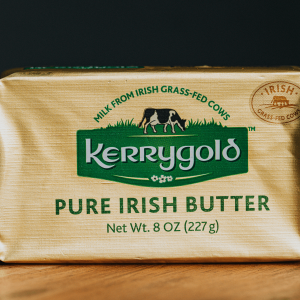
Choosing the right butter is another key aspect of making the perfect, quick cannabutter; after all, it is the staple ingredient. Unsalted butter is a popular choice due to its pure, creamy taste that allows the cannabis flavor to shine. But if you’re a daredevil, salted butter can add an extra ‘oomph’ to your cannabutter, marrying the cannabis and salt together in a surprising twist of taste.
Optional Additions for Flavor Enhancement
And now, for the secret sauce – flavor additions! Think of these as the cherry on top of your sundae or the perfect accessory for your outfit.
Want to add a bit of sweetness to your cannabutter? Consider adding honey or maple syrup to the mix. For the herb enthusiasts, rosemary or thyme can add a savory depth to your cannabutter. Just remember, less is often more.
Straining and Storage: From Crunchy to Creamy, and a Long Shelf Life
To make the leap from a novice cannabutter chef to a master, you need to understand that every detail matters, from the minuscule to the monumental.
Two areas that often get overlooked in the cannabutter-making process? Straining and storage. Let’s get into the nitty-gritty of these essential steps.
Filtering Out Plant Material for a Smooth Cannabutter
Think of straining as the bouncer of your cannabutter club. It stands at the door, letting the smooth, creamy cannabutter into the party and keeping the unwanted, crunchy plant material out.
Without proper straining, you’ll end up with a gritty texture that’ll mess with the overall quality of your cannabutter creations. So, show that plant material the exit door and ensure your cannabutter is as smooth as, well, butter!
Importance of Proper Straining Tools
A cheesecloth is the unsung hero in the pursuit of cannabutter perfection. It doesn’t demand attention, but it definitely delivers.
With a simple, effective design, it’s the perfect tool to separate the cannabis-infused butter from the plant material, ensuring no unwelcome bits of plant matter end up in your cannabutter. Even better, all you have to do is carefully pour your cannabutter through the cheesecloth and squeeze out any of the excess!
So, invest in a good quality cheesecloth. It’s one tool that will strain your butter, not your patience.
Storing Cannabutter for Extended Use: Because Good Things Should Last
Like a fine wine or a vintage vinyl record, great cannabutter should be savored over time. But how do you make sure your cannabutter stays fresh? The secret is in proper storage.
Keep it in an airtight container in the fridge, and it’ll last for up to two months. Need more time? No problem. Your cannabutter is freeze-friendly, lasting up to six months in the freezer. Just remember to store it properly, because fresher cannabutter equals a better experience, every time. And who doesn’t want that?
Dosage Considerations
While preparing cannabutter is an art, dosing it correctly is a science. It’s essential to understand your personal tolerance levels and carefully calculate the THC content per serving. Each person’s tolerance to cannabis is different, and it’s important to start low and go slow.
To calculate the THC content per serving, divide the total amount of THC in your cannabis by the number of servings in your recipe. This gives you a rough estimate of the THC content per serving.
Keep in mind that different strains have different levels of THC, so it’s crucial to know the potency of your chosen strain.
As for portioning and labeling, it’s always a responsible practice to clearly label your cannabutter and the edibles you make with it. Include the estimated THC content per serving on the label to ensure everyone knows what they’re consuming. This way, everyone can enjoy the benefits of your cannabutter creations without risking an unexpected high.
The Fast and the Flavorful: Tips for Enhancing Efficiency
Switch on your efficiency mode because we are about to dive into the art of making bulk cannabutter and streamlining the process.
First up, batch preparation is your new best bud (pun intended!). By creating a substantial amount of cannabutter at once, you save both time and energy in the long run. It’s like meal prepping, but instead of quinoa salads, you have cannabutter at hand for all your impromptu cooking sessions.
Next, consider using pre-prepared cannabis. It’s the culinary equivalent of a fast pass at an amusement park – it gets you to the fun part quicker.
Lastly, as with any kitchen endeavor, maintaining a clean and organized workspace is not just about aesthetics. It’s the secret ingredient to a hassle-free, enjoyable cannabutter-making experience. So, clear those countertops, sharpen those knives, and get ready to create some cannabutter magic more efficiently!
Recipes and Culinary Ideas
When life hands you cannabutter, you make, well, just about everything!
From savory to sweet, the culinary world is your edible oyster when it comes to incorporating this cannabis-infused delight. Let’s explore.
Incorporating Cannabutter into Various Dishes
From breakfast to dinner and every snack in between, there’s a dish waiting to be infused.
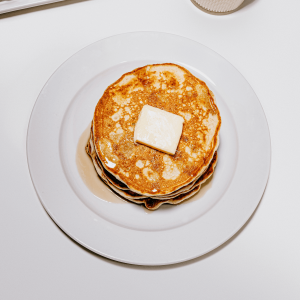
Imagine starting your day with a slice of warm toast generously slathered with cannabutter, or maybe a fluffy pancake stack with cannabutter melting between each layer. Sounds like a tasty way to wake n’ bake, right?
However, when lunch rolls around, why not whip up a bowl of creamy soup with a cannabutter base?
And for dinner, how about a rib-eye steak, seared to perfection and topped with a dollop of cannabutter for an extra kick? The possibilities are endless, and the flavors — unforgettable.
Quick and Easy Recipes for Beginners
If you’re just starting out on your cannabutter culinary journey, don’t worry – we’ve all been there. As a beginner, aim for simplicity. Familiar recipes that you’ve cooked before are a great starting point.
Try making a classic spaghetti aglio e olio, substituting regular butter with cannabutter for a cannabis-infused twist. Or how about a batch of chewy, gooey chocolate chip cookies? Just replace the butter in your recipe with cannabutter, and voila – you’ve got yourself a sweet, cannabis-infused treat!
Dos and Don’ts of Cooking with Cannabutter
Now, let’s talk about some “pot” protocol. When cooking with cannabutter, there are a few key rules to keep in mind.
- DO start with a small amount. Remember, you can always add more, but you can’t take it away.
- DON’T use cannabutter in recipes that require high heat. High temperatures can degrade the THC, reducing the potency of your edibles.
- DO store your cannabutter properly. Keep it in a cool, dark place to maintain its potency and freshness.
- DON’T forget to label your cannabutter-containing dishes. It’s important to make sure everyone knows what they’re consuming.
- And most importantly, DO have fun and experiment. Cooking with cannabutter opens up a whole new world of culinary creativity. So, grab your apron, pick up your spatula, and get cooking!
Troubleshooting Common Issues
Are you currently staring at a rough cannabutter batch? No sweat, we’ve all been there. Here are some tips and tricks you might want to consider for the next round.
Addressing Potency Concerns
Feel like your cannabutter is more ‘butter’ than ‘canna’? Remember, it’s all about the cannabis flower to butter ratio. Use more buds for a stronger kick, less for a gentle buzz. And of course, the strain matters. A stronger strain equals a stronger product.
Tips for Reducing the Cannabis Flavor
Does your cannabutter taste like you’re grazing in a field of hemp? No problem. Some people find that adding a bit of dairy (hello, heavy cream) or some herbs/spices helps mask the flavor.
You might also consider using a water bath method during the infusion process to help extract and wash out some of that grassy flavor.
Adjustments for Future Batches
So, you’ve made your first batch of cannabutter, and it’s…a learning experience. Fantastic! Keep notes of what worked and what didn’t.
Was it too strong? Not strong enough? Did it taste too green? Understand that the cannabutter journey is a ride, not a destination. Each batch is a step towards creating your perfect blend. So keep churning because practice makes perfect and you’ll be a pro in no time.
Summary
To wrap it up, fast and efficient cannabutter preparation involves a few key steps.
It all starts with batch preparation – making a big batch to save time and effort. Using pre-prepared cannabis can speed up the process, getting you to the “fun part” quicker. Keeping a clean workspace makes the cannabutter-making experience smooth and enjoyable.
It’s also important to embrace experimentation in your culinary cannabis adventures. Don’t worry if your first few attempts aren’t perfect – trial and error is part of the process. Take notes, refine your method, and remember that each batch brings you closer to mastering your unique blend.
Lastly, always prioritize responsible and informed cannabis use. Label your cannabutter and edibles, store them properly, and start with small amounts for a safe and enjoyable experience. Happy cooking!
Frequently Asked Questions
1. How long to infuse butter for edibles?
The duration required to infuse butter for edibles can vary. However, a common guideline is to simmer your mixture of cannabis and butter for approximately two to three hours. This slow and steady approach ensures all the THC gets infused into the butter without degrading it. Always remember to stir the butter mixture occasionally to prevent any burning.
2. How long does Cannabutter take to have an effect?
The effects of edibles made with cannabutter can vary from person to person and are influenced by various factors such as personal tolerance, metabolism, and the amount consumed. As a general rule, though, you can expect to start feeling effects anywhere from 30 minutes to 2 hours after ingestion. It’s important to start with modest portions and wait sufficiently before taking more to avoid overconsumption.

 Rewards


