In the intricate process of cannabis cultivation, learning how to dry weed plays a vital role in preserving the plant material’s top-notch quality and maximum potency.
The drying process has a significant impact on the ultimate flavor, aroma, and overall effectiveness of the product, which is why it’s crucial to understand the key factors that influence drying quality. These include maintaining the right temperature, humidity, and airflow, for starters.
If not managed properly, drying can lead to the loss of essential terpenes and cannabinoids, compromising the overall quality.
In this blog, we’ll explore the importance of these factors, dive into best practices for effective drying, and discover how different drying methods can influence the final product’s quality. Let’s get started!
Harvesting Cannabis for Drying
Harvesting cannabis for drying is a crucial step in the cultivation process that directly impacts the quality of the final product.
In this section, we’ll dive into the details of this important phase, guiding you through the best practices to ensure a successful harvest and ideal drying conditions.
Optimal Timing for Harvesting
The best time for harvesting cannabis for drying is when the plant reaches its peak potency. This is usually observed when 50% to 70% of the pistils, the small hair-like structures on the buds, have darkened from a vibrant white to a more amber color.
Another indication is the color of the trichomes: they should transition from clear to a milky white color.
It’s crucial to monitor the plant closely, as harvesting too early or too late can affect the overall plant material cannabinoid potency.
Techniques for Harvesting to Preserve Trichomes
- Hand Harvesting: This traditional method involves manually cutting the cannabis buds from the stalk. This technique ensures minimal damage to the trichomes.
- Dry Trimming: After cutting, allow the buds to dry before trimming off excess leaves. This helps preserve trichomes to a great extent as handling wet buds can cause trichomes to stick to your hands or tools.
- Use of Sharp and Clean Tools: Always use sharp, clean tools, like trimming scissors, to prevent damage and contamination. Dull or dirty tools can damage the trichomes and reduce the effectiveness of your cannabis.
- Avoid Excessive Handling: Try to touch the buds as little as possible during the harvesting process. Excessive handling can lead to trichome loss.
- Controlled Drying Environment: Post-harvest, the drying environment should be dark, with a temperature between 60-70°F (15-20°C), and relative humidity around 50%. This helps preserve the sensitive trichomes and ensures a slow, gradual dryness.
Preparing the Drying Space
When it comes to drying, it’s crucial to carefully select a suitable area and drying rack. Look for a space that allows ample air circulation, avoids direct sunlight, and ideally, is in a low-humidity environment to speed up the drying process.
Make sure to remove any potential sources of contamination that could affect the quality of the items being dried. Also, consider the size of the cannabis drying room in relation to the volume of items needing to be dried to prevent overcrowding.
Importance of Controlled Environmental Conditions
The importance of controlled environmental conditions cannot be overstated! These conditions play a vital role in the drying process, impacting how quickly excess moisture evaporates and the final quality of the dried product.
Excessive heat can cause the outer layer to dry too fast, trapping too much moisture back inside and potentially leading to issues like mold growth.
On the flip side, a low temperature may prolong the drying period unnecessarily. So, maintaining an optimal temperature and humidity level is key to striking the perfect balance between efficient drying and quality preservation.
Hanging and Trimming
When it comes to harvesting fresh cannabis, the hanging and trimming process plays a crucial role. Let’s explore further:
Proper Techniques for Hanging Cannabis Plants
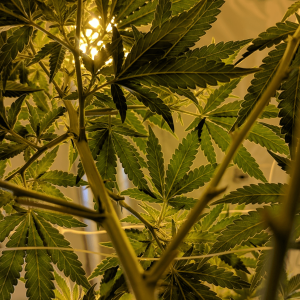
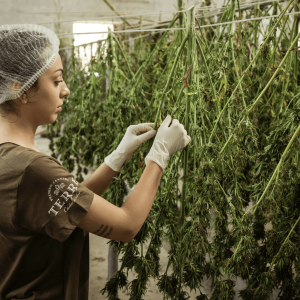
The first step starts with the proper hanging of the cannabis plants. First, cutting the branches into manageable sizes is recommended, ideally 12 to 16 inches long. Then, hang the branches upside down in a room with good air circulation and a temperature of around 70 degrees Fahrenheit.
It’s important to keep the humidity level at about 50% to prevent mold growth. Also, the environment around marijuana plants should be dark as light can degrade the cannabinoids, which are the compounds responsible for the plant’s medicinal properties.
Trimming Methods to Enhance Drying Efficiency
Trimming is equally important in the drying process. This involves removing the extra foliage from the cannabis flower buds.
There are two common methods, wet trimming and dry trimming.
In wet trimming, the process is done immediately after cutting the plant and before drying buds. Though it’s more labor-intensive, wet-trimmed buds have a cleaner look and they are less likely to mold.
Dry trimming, on the other hand, is done after the plants have dried. This method is easier and can help preserve the flavor and aroma of the buds.
In both methods, careful trimming can enhance drying efficiency and overall product quality.
Monitoring Humidity and Temperature
When it comes to proper drying, it’s crucial to maintain the perfect balance of humidity and temperature. Keeping humidity levels between 30% and 50% and the temperature between 20°C (68°F) and 22°C (72°F) is ideal. These temperature levels not only prevent mold formation but also, make the drying process more efficient.
Remember, these parameters may vary depending on the substance or material you’re drying.
Now, to make sure you can accurately monitor these environmental conditions is a whole other topic. Luckily, there are a variety of tools and devices available on the market.
For starters, hygrometers are great for measuring humidity levels. They come in both analog and digital versions, with the latter offering benefits like remote monitoring and data logging.
For temperature, a standard thermometer works well. But if you need more precise measurements in critical applications, you might want to consider a digital temperature sensor.
Some devices even combine both features, giving you a convenient all-in-one solution for monitoring the conditions of your drying environment.
These tools not only help you maintain the optimum conditions for drying but also allow you to adjust parameters as needed, ensuring the highest quality results.
Cannabis Drying Timeframes
The drying process plays a crucial role in cannabis cultivation, greatly impacting the overall quality of the final product.
In this section, we’ll dive into the timeframes for cannabis drying, exploring the various factors that influence the duration and their implications for the quality and potency of the dried cannabis. Keep reading to learn more!
General Timeline for Drying Cannabis
We cannot stress enough how the drying process is a critical step in cannabis cultivation. This process typically takes between 7 to 14 days but can fluctuate based on the specific environmental conditions.
The ideal environment for drying cannabis buds is a dark room with proper air circulation and a relative humidity of around 50%. Additionally, maintaining temperatures between 60 and 70 degrees Fahrenheit is crucial.
Indicators of When the Drying Process is Complete
Knowing when the drying process is complete can be a bit of a challenge, but there are a few key indicators to look for.
First, the stems of the cannabis plants should snap, not bend, when they’re dry.
Additionally, the buds will feel slightly crunchy to the touch on the outside. However, they should still be a bit sticky when you break them open, indicating that while the outside of the marijuana buds is dry, the inside retains the necessary moisture essential for proper curing.
Always remember, over-dried cannabis can result in a harsh smoke, whereas under-dried can lead to mold development, so monitoring during this process is crucial.
Importance of Darkness
Darkness plays a crucial role in the post-harvest handling of cannabis. This is particularly true in the drying phase, where cannabinoid and terpene preservation is essential.
Note that keeping drying areas dark is not a random choice but a strategic move based on sound scientific reasoning. Here’s why…
Firstly, darkness prevents the degradation of cannabinoids, the active chemical compounds responsible for the medicinal and recreational properties of cannabis. Light exposure, specifically the ultraviolet (UV) portion of the spectrum, can break down these cannabinoids, significantly lowering the potency and efficacy of the final product.
Alongside cannabinoids, terpenes – the aromatic compounds that contribute to the distinctive smell, taste, and potentially even the effects of cannabis – are also highly susceptible to light-induced degradation.
Under the influence of light, terpenes can oxidize and lose their unique characteristics, negatively impacting the sensory experience of the cannabis product. Also, degraded terpenes can lead to an alteration of therapeutic benefits associated with each strain.
In conclusion, darkness isn’t just a preference, it’s a must in the cannabis drying process. It helps safeguard and preserve vital cannabinoids and terpenes, ensuring the quality, potency, and overall sensory delight of the dried and cured cannabis buds.
Curing Cannabis
After drying cannabis flower, the next critical step in cannabis cultivation is the curing process.
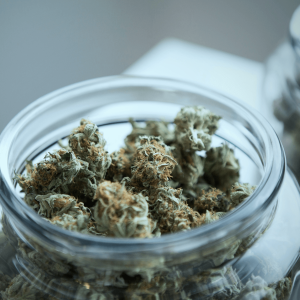
Transitioning from drying to the curing process involves moving your cannabis from a controlled, air-dried environment into an enclosed space like a glass jar. The curing process is a crucial stage because it allows the slow release of remaining moisture from within the plant under highly controlled conditions.
It’s important to avoid rushing this curing process, as proper curing can significantly enhance the quality, flavor, and potency of your cannabis buds.
Importance of Curing Cannabis for Flavor and Potency
The curing process is an essential aspect of cannabis cultivation that is often overlooked but has a significant impact on the final product’s taste and potency.
During curing, the remaining chlorophyll in the plant continues to break down, which greatly enriches the flavor profile of the cured cannabis.
Additionally, curing cannabis allows the flower to reach its full potency potential. This is because they help preserve the terpenes, which are responsible not only for the plant’s aromatic diversity but also contribute to the overall cannabis experience by promoting the entourage effect.
In essence, taking the time to properly cure your cannabis will reward you with a higher quality, more flavorful, and potent product.
Common Mistakes to Avoid
When it comes to cannabis cultivation, the drying process is absolutely critical.
It’s a delicate balance that can greatly affect the quality and potency of the final product. But it’s also an area where many novices stumble.
So, let’s dive into the common pitfalls to watch out for in the cannabis drying process.
Pitfalls in the Cannabis Drying Process
Rushing the Drying Process:
One of the most common mistakes is trying to speed up the drying process. This can lead to a harsh smoke and diminished flavor. Remember, slow and steady wins the race here.
Poor Ventilation:
Inadequate air circulation can cause humidity to build up, leading to mold growth. It’s crucial to maintain appropriate airflow around your plants throughout the drying process in order to ensure high-quality cannabis.
Inconsistent Temperature and Humidity:
Maintaining a consistent, controlled environment, with ideal relative humidity is key. Fluctuations in temperature and humidity can lead to bud rot and other unwanted issues.
Over-drying:
Over-drying the buds can result in a loss of cannabinoids and terpenes, reducing the potency and flavor.
Tips for Troubleshooting Common Issues
- Monitor your Environment Closely: To avoid the pitfalls mentioned above, it’s important to keep a close eye on your drying environment. Invest in a good quality hygrometer to monitor humidity levels and ensure they remain within a safe range.
- Control your Drying Speed: Slowing down your drying speed can be as simple as adjusting your temperature and humidity settings, or reducing the airflow in your drying area.
- Check for Mold Regularly: Regular inspections for mold can help you catch any issues early before they ruin your entire crop. If you spot any signs of mold, remove the affected buds immediately to prevent it from spreading.
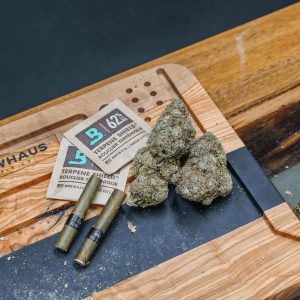
- Rehydrate Over-dried Buds: If you’ve accidentally over-dried your buds, don’t panic. There are several techniques to rehydrate dry cannabis, from using humidipaks to a simple slice of bread.
Tips for Small-Scale Drying
When it comes to drying and storing cannabis, particularly on a smaller scale, it’s all about striking the right balance. Here’s a closer look at a few techniques and DIY solutions for home growers.
Techniques for Drying Smaller Amounts of Cannabis
- Air Drying: This is the simplest and most common technique. To begin, place the harvested cannabis in a dark, well-ventilated room with humidity levels around 50% and temperatures near 70 degrees Fahrenheit. The drying process typically takes about 10-14 days.
- Brown Paper Bags: Another approach involves placing small amounts of cannabis inside brown paper bags, which are then stored in a dark, dry room. This method requires daily checks to prevent mold growth and ensure even drying.
- Dehydrators: Although not a traditional method, some growers use food dehydrators to dry their cannabis. While this can speed up the process, it can also lead to the loss of terpenes, affecting the flavor and aroma when not done properly.
DIY Solutions for Home Growers
- Hanging Method: This method involves hanging the whole cannabis plant or branches upside down in a dry, dark room. This allows for an even drying process as the water travels from the stem to the buds.
- Screen Drying: This involves laying the cannabis buds on a mesh screen in a single layer. This can be a practical solution especially when space is limited.
- Box Drying: Create an improvised drying box using a large cardboard box and some wire hangers. Hang the cannabis branches inside the box, which can be stored in a dark, dry place for an effective, discreet drying solution.
Remember that patience is key in the drying and curing process.
Although it may be tempting to speed things up, a slow, steady dry will help preserve the quality of your freshly harvested cannabis plants. Pay attention to your environment, keep a close eye on humidity and temperature, and you’ll be well on your way to a successful harvest.
Conclusion
In conclusion, learning how to dry weed is a crucial step in ensuring the quality of your crop.
It starts with careful harvesting, goes through controlled drying in an environment where temperature and humidity are carefully monitored, and ends with a thoughtful curing process. Each step plays a vital role in preserving the aroma, flavor, and overall quality of your cannabis.
However, it’s important to note that there’s no one-size-fits-all approach to this. What works for one grower may not work for another. So, we encourage all growers to experiment, refine techniques, and find what works best for your specific crop and conditions.
The path to perfection involves trial and error, but the end result is definitely worth it.
Frequently Asked Questions
1. What is the best process for drying weed?
The ideal process for drying weed involves hanging the plants upside down in a dark, temperature-controlled room with ample ventilation. This drying method, often called air drying, takes about two weeks and helps preserve the flavor, aroma, and potency of the plant.
2. Can you dry weed in a jar?
While it is possible to further dry and cure weed in a jar, it is not recommended to use a jar for the initial drying process. Using a jar for the initial drying and curing step may result in uneven drying and could lead to the growth of mold due to a lack of airflow in the airtight container.
3. How do you know if buds are dry enough?
The buds are generally dry enough when the smaller stems snap instead of bending, and the outside of the buds feels dry to the touch. However, the inside of the individual buds themselves may still be moist, and further curing may be needed to achieve a smoother smoke.

 Rewards


